
How to Blur a Face in a Video: Online and Manual Steps
Blur faces in a video online or with a moving mask. Follow the steps for computers, iPhone, Android, and YouTube, then save and check your finished video.
Open your recording in an online face-blur service, apply the effect, then download a new MP4. To hide just one person or adjust a moving face, use a blur mask in a video editor.
How to blur faces in a video online
1. Choose your recording
Open VideoBGRemover and select Choose a video. Pick an MP4, MOV, or WebM file up to 100 MB, 1080p, and 30 fps, then preview it to confirm you have the right recording.
Online processing uploads your file. If the recording must stay on your device, use an editor configured to work locally; review the privacy policy before uploading sensitive footage.
2. Apply the face blur
Select Blur faces for free and sign in if prompted. Face blurring is free and uses no credits. Wait for the finished preview to appear.
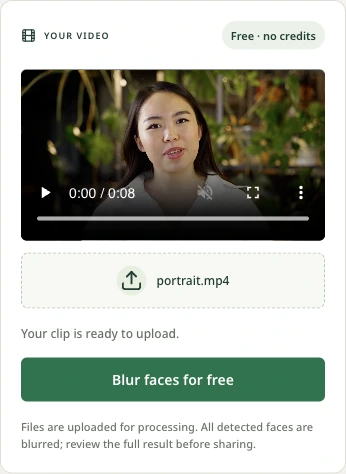
3. Save and check the MP4
Play the result, select Download MP4, then open the saved file. Download it within 24 hours of uploading.
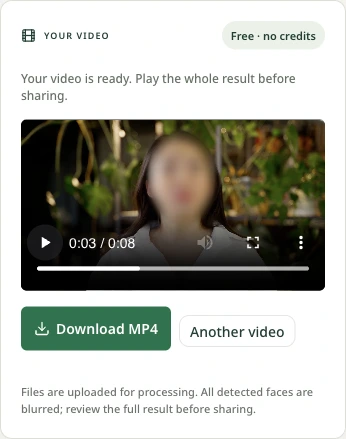
The face is softened while the rest of the scene stays clear:
Watch each person through the whole saved video, especially during turns or when someone crosses in front of a face. Automatic detection can miss those moments. If a face becomes visible, adjust that section with a mask using the steps below.
Face blur keeps the original sound. Blurring a face does not guarantee anonymity: check speech, names, clothing, and identifying surroundings too.
Blur one face or adjust a moving face
A mask limits the blur to the area you draw, so you can cover one person while leaving others clear. Make it slightly larger than the face, and keep it over the face as the person turns. Start the masked layer before the person appears and end it after they leave.
Manual mask example, rendered in FFmpeg.
On a computer
- Import the recording, open Effects, apply Blur across the full clip, and export a blurred copy.
- Remove Blur from the original timeline. Place the blurred copy above it, aligned to the same start and duration.
- Select the upper copy, open Mask, and fit a circle or rectangle around the face.
- Use Track mask → Track where available. Check the path and correct any drift.
- Mute duplicate audio, then Export and check the saved video.
If the whole scene is blurred, check the lower layer: it should be the unblurred original. For a short missed section, trim the masked upper layer to that section with a little extra time at both ends.
If tracking is unavailable, use mask keyframes: reposition the mask later in the shot, then replay between keyframes.
On iPhone or Android
Use the online steps in your phone's browser, or follow CapCut's mobile mask method:
- Create a project and add the recording. Select the clip, open Effects → Video effects, search for Blur, and apply it across the clip.
- Select Overlay and add the original recording again, aligned to the same start.
- Select this unblurred overlay, open Mask, and fit a circle around the face. Turn on Invert so the blurred layer shows through the face area while the overlay keeps everything else clear.
- Add a Keyframe, move forward, reposition the mask, and add another. Repeat when the face changes direction; play between keyframes to check the movement.
- Mute duplicate audio, then export and open the saved video.
Blur a face in a video on YouTube
For a video already in your channel, open YouTube Studio on a computer:
- Open Content, select the video, and choose Editor.
- Select Blur → Face blur, choose the faces, and select Apply.
- Adjust the blur's time range and review the result. To cover a missed area, use Custom blur with Track object or Fix blur position.
- Save. Keep an original copy: saved editor changes cannot be undone through Revert to original.
If your phone video is too large to upload
A 4K or 60 fps recording may exceed the online limits. Export a copy at 1080p or lower and 30 fps or lower, trim unwanted sections, and keep the file below 100 MB. Keep the original as your backup.
Once the blur is in place, check the final saved copy before sharing it. To keep the person clear and soften the setting instead, follow the background-blur guide.
Example footage: presenter and turning portrait from Pexels.
More Posts

ProRes 4444 vs 422: Quality, Alpha, and File Size
Compare ProRes 4444 vs 422 for image quality, alpha channels, and file size. Choose an editing or transparent handoff format without wasting storage.


How to Remove a Green Screen in Premiere Pro (2026 Guide)
Learn how to remove a green screen in Premiere Pro with this 2026 guide to Ultra Key. Clean up edges and green spill, add a new background, or export a transparent ProRes 4444 clip.

How to Remove Background from Video: A Step-by-Step Guide
Learn how to remove background from video with AI, check moving edges, and choose transparent WebM or a background MP4. Includes a real desktop walkthrough.